My Training Account


Welcome to IATA and thank you for choosing to train with us.
The entire IATA Training team wants to ensure the very best experience for you during your stay with us. Our goal is to provide you with a safe learning environment where you can maximize your potential.
The following pages set out some important information about our Virtual Classroom courses to help you get the most out of your time with us. Please take a moment to read about our procedures. Our team of training coordinators, instructors and product managers will be happy to assist you with any questions or special needs you may have.
I wish you a rich, educational experience during your course.
Thank you for your interest in IATA Training.
Tanja Schmidt
Director of IATA Training
Before the Course
Your e-mail invitations
Once you register for a virtual classroom course you will be sent 2 emails, which will give you all the information that you’ll need to access the virtual classroom platform (Zoom) and the content sharing platform to access your course materials (via IMC):
- Access to the course materials via IMC.Granted access to materials once the order is paid in full
- E-mail from your Training Coordinator, which will be sent a week before the course start date, which includes:
- Your invitation to join the virtual classroom session and access to the course material
- The name of your Instructor
- Information and access details for any pre-reading or pre-work for your course
Please contact us if you have not received these e-mails 1 week before the course start date (please check your spam).
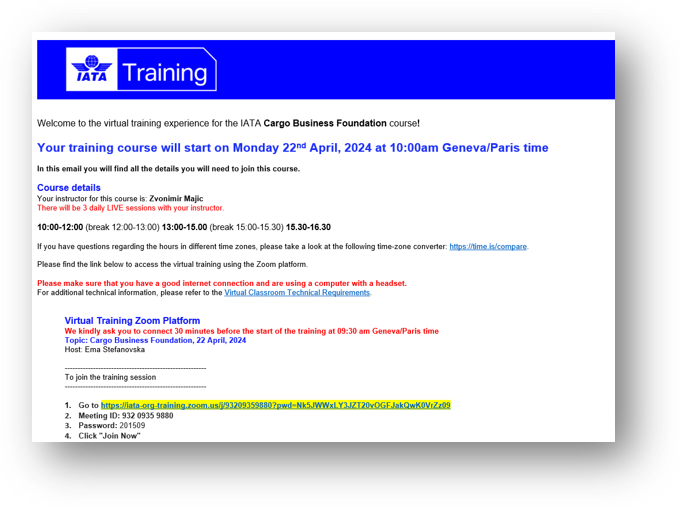
Zoom web app
The virtual classrooms are hosted on the Zoom web app, which allows you to join the training session through your web browser, however, for the best user experience, please download and install Zoom for desktop to benefit from all the functionalities.
Hardware and software requirements
In order to join the training session and participate successfully you will need:
- Laptop or a desktop computer
It is strongly recommended to use a laptop or computer to participate, as it will allow you to use the full range of tools required for the training. - Microphone / Headset
You will need a microphone for audio chat. It is recommended to use a headset (with microphone attached) for better sound quality and to minimize the background noise. - Webcam
(Optional but recommended) Your instructor may require you to start your video during the training session.
If you are attending a Dangerous Goods course or other regulatory training, a camera is mandatory. Your final examination will be proctored live. - Stable internet connection
Please make sure you have a stable internet connection. - Operating system
Please visit our website to learn more about the minimum requirements
Test your audio and video settings
It’s a good idea to test your headset, video and microphone before joining the training.
Join the Course
Join the course
- Please join the virtual classroom 30 minutes before the scheduled start time to check your audio settings.
- Close your e-mail and any other open windows, programs or apps.
- Make sure to keep your microphone on mute when you are not talking, to minimize the amount of background noise.
- Make sure to follow the same meeting etiquette that you would follow in a normal class session, meeting or discussion.
Join from your e-mail invitation - vc
- Locate your e-mail invitation to your Zoom training session
- Click on the link provided in your e-mail invitation
- Enter your name
- Click Join
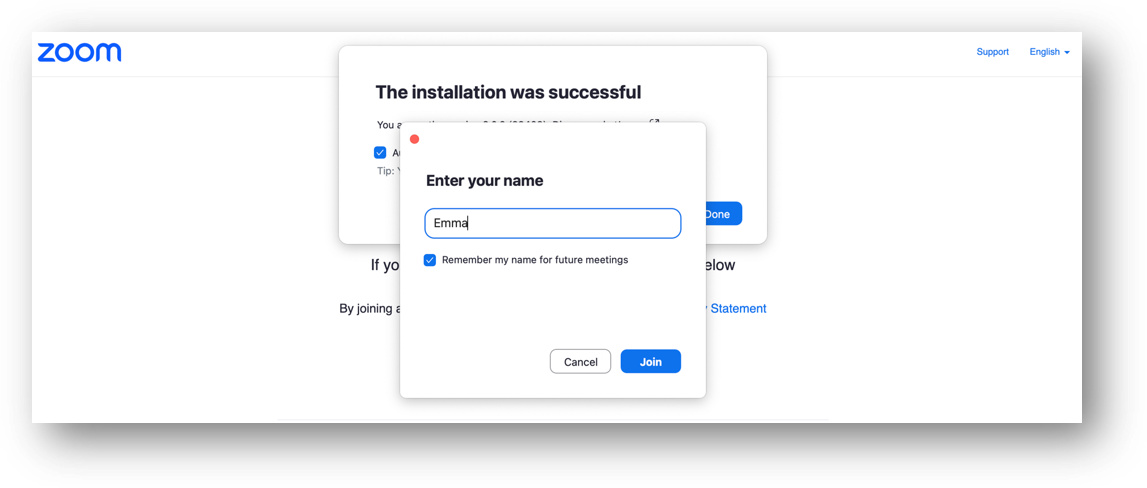
Join your virtual training course - vc
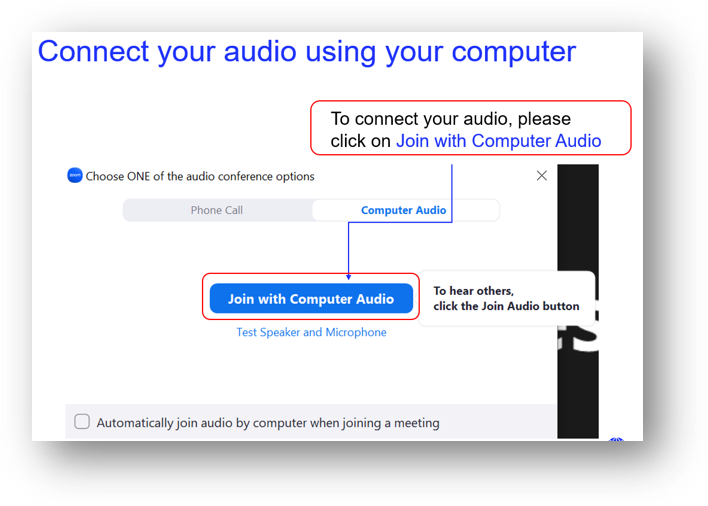
Connect your audio and start your video
Your microphone and webcam will automatically be selected based on your computer’s default settings.
- Click on Join with Computer Audio
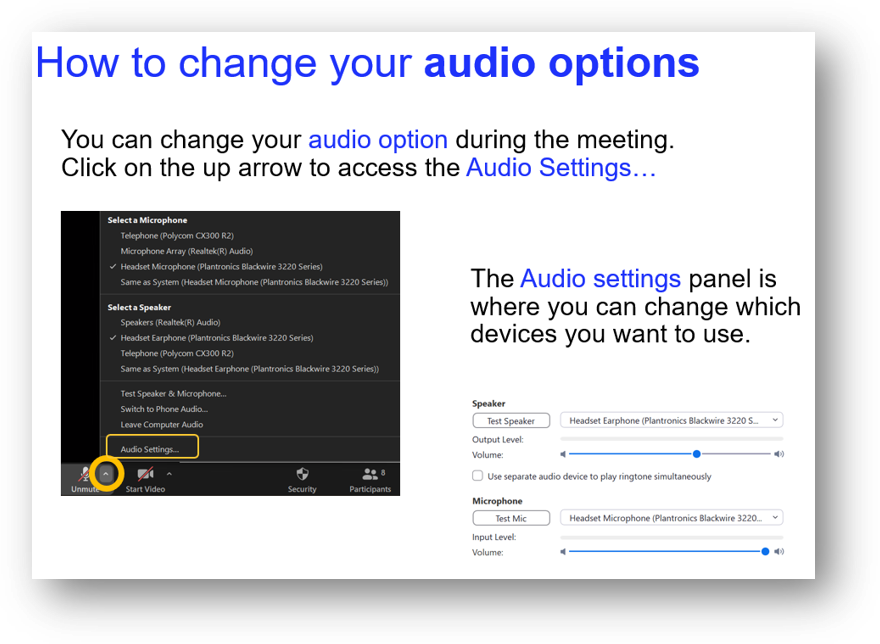
- If you are having audio issues, please click on the ^ arrow next to the microphone and select "Audio Settings"

Course Tools
Control bar for Windows users
When the training session is finished, you can leave the Training Session by clicking the red End button.

In order, from left to right:
- Audio: Clicking on the microphone icon will mute/unmute your audio during the training session. Please make sure to keep your microphone on mute when you are not talking to minimize the amount of noise in the virtual classroom space.
Red mute button indicates it is muted.
Grey mute button indicates it is not muted. - Start/Stop my Video: Click the camera icon to allow the presenter and other participants to see you.
- Participants: Clicking on the person icon will open the participants’ window.
- Chat: Clicking on the comment bubble icon will open the chat window in the lower right side. You can chat with anyone in the class or hold private discussions with any participant.
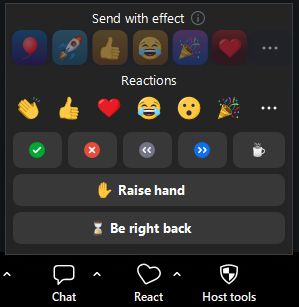
- React: Clicking on the react button will allow you to display various reactions (if the reactions button does not appear, click on ‘more’).
- Sharescreen:Clicking on the upward pointing arrow will Share your desktop, files, applications, websites or videos.
- More Options: The More Options icon (three dots) allows you to copy the classroom information and configure your audio connections.
- Leave the Training: When the training session is finished, participants can leave the training session by clicking on the red X icon on the control bar.
Annotation tools
There are several annotation and feedback tools that will be available to you in the Zoom virtual classroom. You will have a chance to practice using the tools at the beginning of the course.

- Mouse: Deactivate annotation tools and switch to your mouse pointer. This button is blue if annotation tools are deactivated.
- Select (only available if you started the shared screen or whiteboard): Select, move, or resize your annotations. To select several annotations at once, click and drag your mouse to display a selection area.
- Text: Insert text. Please always remember to click away from the text you have entered so that it will be visible to the instructor and other participants.
- Draw: Insert lines, arrows, and shapes.
Note: To highlight an area of the shared screen or whiteboard, select following square or circle icon to insert a semi-transparent square or circle. - Stamp: Insert predefined icons like a check mark or a star.
- Spotlight: (only available if you started the shared screen or whiteboard): Displays your mouse pointer to all participants when your mouse is within the area being shared. Use this to point out parts of the screen to other participants.
- Eraser: Click and drag to erase parts of your annotation.
- Format: Change the formatting options of annotations tools like color, line width, and font.
- Undo: Undo your latest annotation.
- Redo: Redo your latest annotation that you undid.
- Clear: Delete all annotations.
- Save: Save shared screen / whiteboard and annotations as a PNG or PDF. The files are saved to the local recording
Note: This option is only available to viewers if the host has allowed others to save.- To change the file format, click the downward arrow next to Saveand select one of these options:
- PNG: Save as a PNG file. If there are multiple whiteboards, Zoom will save a PNG file for each whiteboard.
- PDF: Save as a PDF. If there are multiple whiteboards, Zoom will save a single PDF containing all whiteboards.
- To change the file format, click the downward arrow next to Saveand select one of these options:
Feebback Tools
During the virtual classroom session your instructor will frequently ask you to use your feedback tools for confirmation that you understand the content and for other feedback.
If you need to step away from your computer for a short while, or as indicated during breaks, please click on the coffee cup icon. Once you are back, please click on the coffee icon a second time to remove it.
If you have a question, you can use the ‘raise hand’ button. Please ensure to un-click it after asking to put your hand back down.
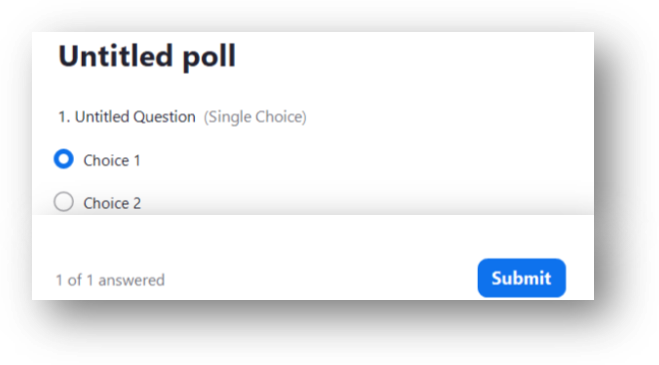
Polls
During your course, your instructor will ask for your input using the Polls feature. When answering a poll question, please select your option and click Submit (if you do not click submit, your answer will not be counted).
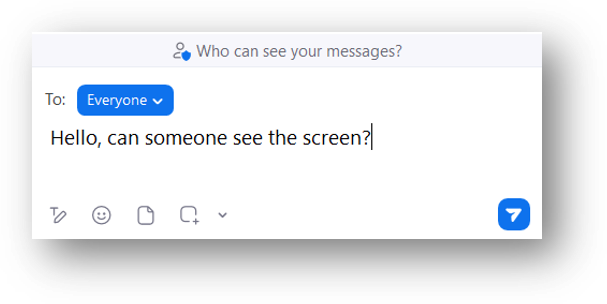
Chat
In your chat panel, select who you would like to send the message to, then press enter on your keyboard.
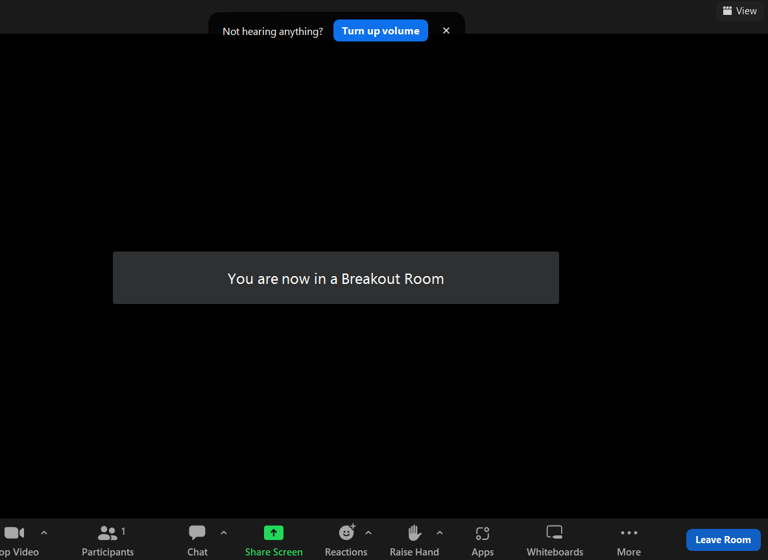
Breakout rooms
Breakout rooms are used to divide participants into smaller groups to collaborate and share ideas on an assignment. If this will be used during the scheduled session, you will be notified by the Instructor.
You will see a notification asking you to join a breakout room.
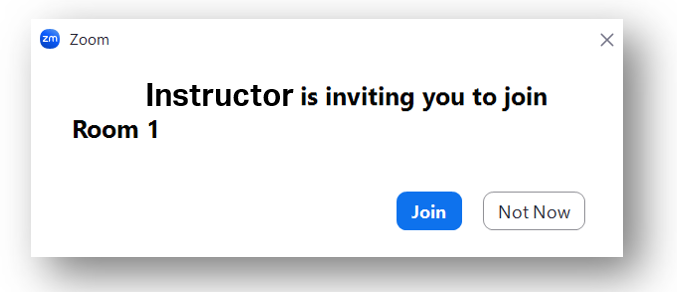
Click ‘Join’, and you will be re-directed to your breakout room.
Control bar for Mac users
When the training session is finished, Mac users can leave the session by clicking Leave.

In order from left to right:
- Audio: clicking on the headset icon will mute/unmute your audio during the training session. Please make sure to keep your microphone on mute when you are not talking to minimize the amount of noise in the background.
The headset icon with a red diagonal line indicates the microphone is muted.
The grey headset icon indicates the microphone is not muted. - Start/Stop Video: clicking on the camera icon will allow the presenter and other participants to see you.
The camera icon with a red diagonal line indicates your video camera is on.
The grey camera icon indicates your video camera is off. - Participants: clicking on the person icon will allow you to see the participants currently in the session.
- Chat: clicking on the chat bubble icon will open a chat window. You can chat with another participant directly in a private chat or address the message to the classroom.
- React: clicking on the react button will allow you to display various reactions (if the button does not appear, click on ‘more’).
- Share screen: clicking on the screen button with an upward pointing arrow will allow you to share your desktop screen or any specific windows you would like to share.
- More: The round button with three dots allows you to explore other functions available within the Zoom meeting session.
- Leave the Training: when the training session is finished, participants can leave the training session by clicking on the red door icon.
Common Situations
I can’t log in
- Verify that you are using the correct link and password.
- Refresh the page to make sure that the session has started.
- Open a new browser window and copy and paste the meeting URL from the invitation email into the browser address bar.
Zoom session loads slowly
- Try to log off and log back in again.
- Close all applications, additional tabs and email, except Zoom.
- Clear your web browser cache and delete temporary files and cookies.
- Verify that the issue is not with your Internet service provider by testing a web page which you access frequently.
Your audio session disconnects
- Reopen the training invitation.
- Rejoin the audio conference by clicking the ‘Audio’ button and selecting ‘Join with Computer Audio’ option.
Your browser crashes
- Open a new browser window and try to rejoin the meeting using the meeting number.
You cannot hear other participants
- Check your phone or VoIP connections and confirm that microphones and headsets are powered and switched on.
- Click Mute then Unmute button.
Other troubleshooting
For additional troubleshooting guidance please view our website www.iata.org/vc-technical-requirements or visit the Zoom training help Center
IATA Bank Details for Course Fee Payment
Complete payment must be received prior to the beginning of the course. Please note that IATA does NOT accept CASH payments. Credit card, bank transfer and Clearing House payments are welcome.
- Bank wire transfers should be made to:
IATA Account No: 404-903-7
Bank Number: 003
Branch Number: 00001 Royal Bank of Canada
1, Place Ville Marie
Montreal, Quebec
Canada H3C 3B5
Swift Code: ROYCCAT2
ABA No. / Routing No.: 021000021
Payment online is easy and can be accessed through our Training Credit Card Payments page on our website. You will need your invoice number and a valid credit card.
Policies
Training Fee & Pricing
- For detailed information on course fees, payment terms, and applicable pricing conditions, please refer to our Pricing Page. Early bird rates may be available for selected courses when booking within the eligible period.
Training Terms and Conditions
- Please read the IATA Training Terms and Conditions to know more about our General Conditions applicable to all IATA Training courses, and the Special Terms and Conditions applicable to the various course formats.
Training Policies
- Visit the IATA website to find out about IATA Training’s Policies, including the Grading Policy and Academic Integrity Policy.
Frequently Asked Questions (FAQs)
- A list of FAQs can be found on our website. If you have a question that has not already been answered, please Contact Us by raising a case through our Customer Portal.
How to raise a ticket?
Complaints Process
- If you would like to make a complaint to IATA Training, please submit your complaint by raising a case through our IATA Customer Portal. Your training experience is very important to us. Please include the title 'Complaint' and we shall prioritize your message.